Child safety is so important, yet we don’t want to scare children unnecessarily. Fortunately, there’s a cute and sweet way to focus on child safety that’s fun and great for math- and fine-motor skills … making a cell phone number bracelet.
I had first seen and pinned an idea for phone number bracelets a few years ago. I loved the idea and wanted to save it for my future grandkids. Now that my granddaughter, Zoey, is 2½ years old, she can benefit from the fine-motor and math activities involved in making a phone number bracelet. And she can understand what she would need to do if she gets lost in a public place like an airport, mall, zoo, or amusement park.
Disclosure: This post contains affiliate links (at no cost to you).
Materials Used for Making Phone Number Bracelets

Tray for Phone Number Bracelets
- number beads
- pony beads with large hole (for separating parts of the phone number)
- novelty beads for interest (You just need 1 type: I had available sea life beads, zoo animal beads, and transport beads.)
- thick elastic cord for stringing (I cut each piece to 8″ for Zoey’s wrist and to allow extra for making the knot.)
- Multicraft tray
- containers for beads
How to Make Phone Number Bracelets
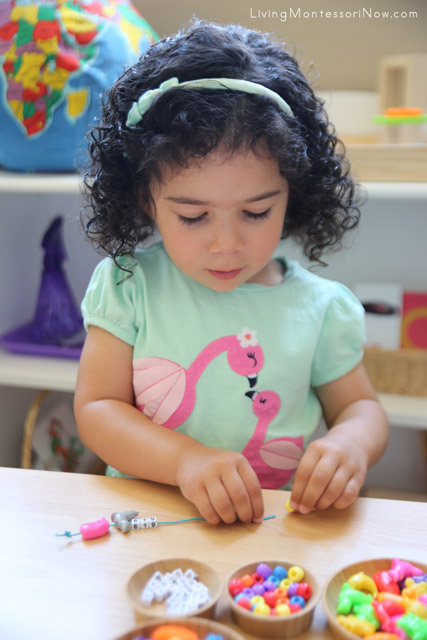
If you place the beads and cords on a tray, your child can choose when to work on phone number bracelets. Zoey is making arm and ankle bracelets with cell phone numbers for her mom, her dad, and me. Since she’s making 6 bracelets, it works well to have the tray available for to use whenever she’s interested. So far, she absolutely loves the activity and is excited about each bracelet she makes!

Stringing Beads to Make a Phone Number Bracelet
You only need to have one type of bead. I have a variety of beads available for different projects and themes, so I added three different types to Zoey’s tray. She most often tends to choose the sea life beads, although she likes them all. A vehicle lover would probably especially like the transport beads.

Looking for the Next Number in the Phone Number Bracelet
You can vary how your child adds the phone number. For Zoey, I told her which number was next and then she chose it from the bowl of number beads. If your child needs help identifying numbers, you can just say which number is needed and hand the number to your child (1st period of the 3-period lesson). For older children, you could write the phone number on a piece of paper for them to duplicate on the bracelet. Older children could have the phone number memorized as well.
When your child is finished stringing the beads, just knot the cord a few times and cut off the extra. For the ankle bracelets, I tried using a plastic bracelet that snaps together for stringing the beads. I found that the elastic cord actually works best.
Note: In addition to making the bracelets, Zoey has spent a lot of time washing the novelty beads. So you might even want to set up a bead-washing activity!

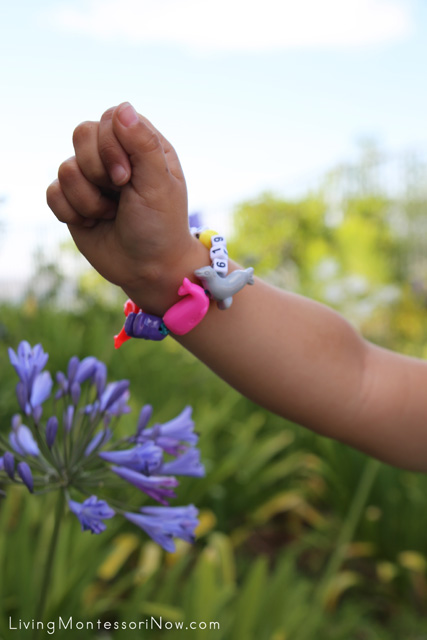
Completed Phone Number Wrist Bracelet
Zoey is so proud of her wrist bracelet.

Completed Phone Number Ankle Bracelet
And her ankle bracelet! (Snail courtesy of the snails that are often found near my home.) You don’t need to make both a wrist- and an ankle bracelet. We just made both because Zoey has so much fun with the activity, and this gives her the choice of a wrist bracelet or an ankle bracelet when she’ll be going someplace where it’s needed.
Note: In case you’re wondering, Zoey’s outfit and sandals are from Gymboree!
How to Introduce Child Safety Ideas to Children Using the Phone Number Bracelet
The phone number bracelets are a cute and fun project that lightens the topic of child safety. I just told Zoey that if she ever gets lost, she should look for a mommy with children. Then she can show the mommy the bracelet so that she can call Zoey’s mom or dad, who will come find Zoey. I said she can ask the mommy to call the phone number, but a child can just show the bracelet if he or she is too shy or frightened to talk.
Zoey’s proud of her new bracelets, and I’m happy that we have one more safeguard in place for my precious granddaughter.
I’d love to hear about your favorite child safety precautions.
Learn more about my eBook Montessori at Home or School: How to. Teach Grace and Courtesy!
If this is your first time visiting Living Montessori Now, welcome! If you haven’t already, please join us on our Living Montessori Now Facebook page where you’ll find a Free Printable of the Day and lots of inspiration and ideas for parenting and teaching! And please follow me on Instagram, Pinterest (lots of Montessori-, holiday-, and theme-related boards), and YouTube. While you’re here, please check out the Living Montessori Now shop.
And don’t forget one of the best ways to follow me by signing up for my weekly newsletter. You’ll receive some awesome freebies in the process!


Love the safety phone number bracelets! We will definitely make before our summer travels. Here are a few tips I have. 1) I print all of our phone numbers and home address, (along with any of our other family’s info that we are traveling to) on address labels. I put these inside the clothing that my children will be wearing on the trip. Since my children have allergies, I list these as well. 2) I have photo ID’s made for each of my children from the Iowa DMV. They only cost me $5 and the kids had a blast having them made. If they would be lost, the police already have a photo in their system. This also helps at the airport as I don’t need to travel with birth certificates. 3) We also have the allermates bracelets. They are well-made, fun and identify their allergy to anyone who would find them! 4) Also good to have a passport made for your children if you can afford it. Then it would make it harder for an abductor to take them out of the country as they are already in the government system.