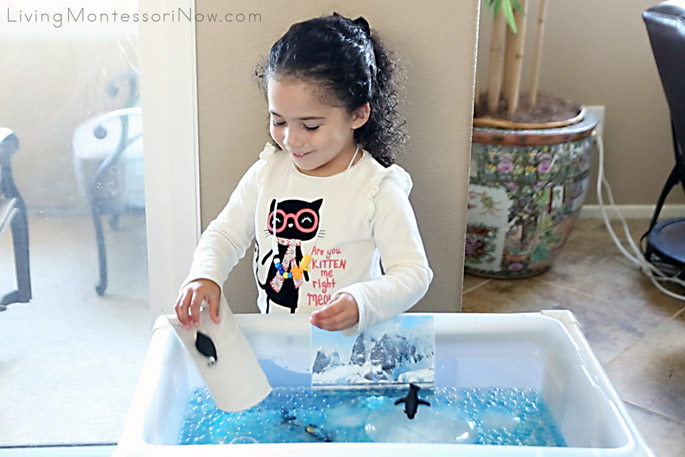
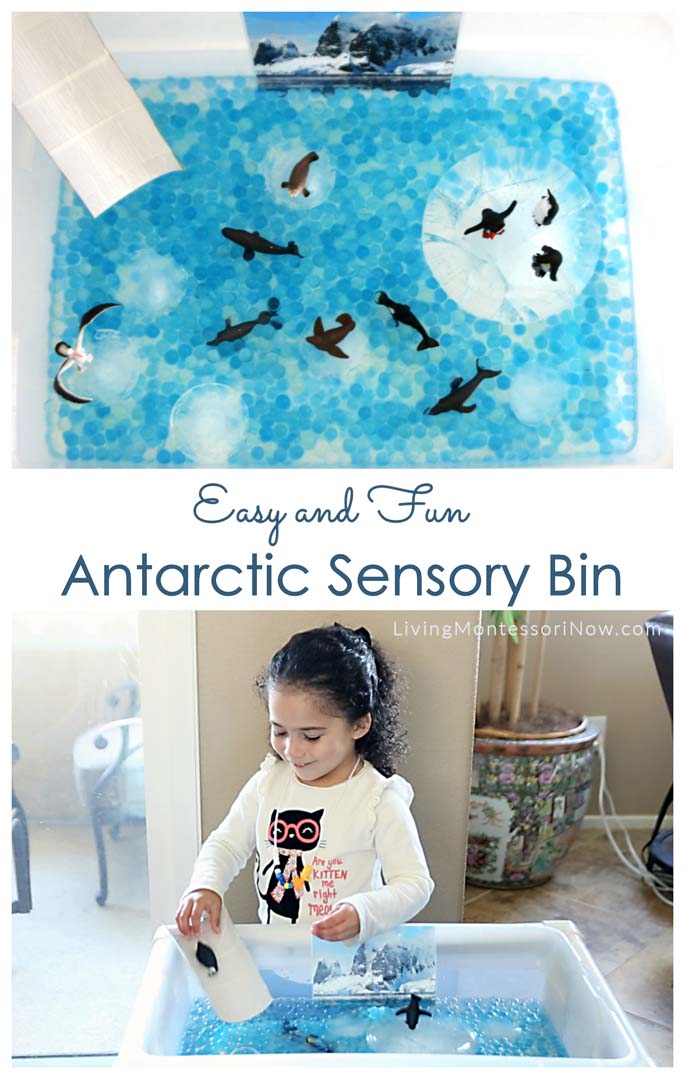
Preparing sensory bins can seem a bit intimidating if you’re trying to create an authentic-looking habitat. But they can be easy to prepare if you’re just trying to re-create certain concepts while making the bin fun and rich in sensory experiences. This Antarctic sensory bin is quite easy to prepare and is fun for both winter and summer. Winter is a natural time to study Antarctica, and the “icebergs” make it a refreshing activity in the hot summer weather.
Disclosure: This post contains affiliate links (at no cost to you).
Easy and Fun Antarctic Sensory Bin – YouTube Video
Zoey always has fun with her sensory bins. I’m sure she’d enjoy this one for a good length of time, although I’m just having it out for a short period before I prepare a spring sensory bin. I’ll get it out again sometime in the summer.
Our whole family loves Zoey’s conversations while she uses her sensory bins. This time she used a lot of music, too!
Antarctic Sensory Bin (and DIY Sensory Table)

Antarctic Sensory Table
I already had my DIY sensory table, so it’s easy to make any sensory bin into a sensory table. I love the DIY sensory tables my daughter-in-law, Chea, and I put together in September 2015! Zoey has one at her home and one at my home. They have different themes and activities.
To put together the DIY sensory table, we used the directions for “The $30, 30-Minute, Do-It-Yourself Sensory Table” from A Teaching Mommy. Ours cost a bit more than $30, although the price will vary according to where you get PVC pipe. We were able to get our PVC pipe at Lowe’s. We didn’t want to cut pipe and were lucky that the guys at Lowe’s were willing to cut it for us. Chea and I just turned all the PVC pipe sides with writing to the bottom and back.
I found the specified storage container for the sensory tables at Walmart.
The sensory table is designed to be disassembled. We found it best to hammer the pieces together after assembling the table to avoid having the table collapse. So ours are more permanent, which is fine. I have a sensory table available at all times on my balcony or next to my balcony door. Zoey is absolutely in love with sensory bins/tables!
Materials Used for Antarctic Sensory Bin/Sensory Table
- DIY sensory table (This has been AWESOME! It’s been very durable and the perfect container for our sensory bins. Of course, you can use a bin on the floor.)
- 2 parts blue water beads to 1 part green water beads (Note: This isn’t necessarily the best combination for Antarctica. It’s just my usual pond or ocean mixture. I used the water beads from the frog sensory bin, wonderful whale sensory bin, and Arctic sensory bin.) I just use distilled water for the sensory bin and rinse the water beads thoroughly before drying them out when I’m finished with the sensory bin. After the Arctic sensory bin, I just rinsed the water beads and then added distilled water.)
- Distilled water frozen in a round food storage container for the large “iceberg” and smaller “icebergs” frozen in a silicone muffin pan. You could use any type of storage container to freeze the “icebergs.” Since the ice only lasts for a few hours, you could use foam wrap (like I did for the Arctic sensory bin) or something else to represent the ice at other times.
- Safari Ltd. Antarctica TOOB
- Mountains and Icebergs of Antarctica photo, printed on 5×7 photo paper and laminated
- Scotch Thermal Laminator with Laminating Pouches
- Penguin slide made from an empty paper towel roll shortened and cut in half. Then I simply covered it with white duct tape.
Feel free to adapt your sensory bin for your family. These are just the materials I used. Important: If you use this with a toddler, be aware that water beads are very dangerous for children who mouth objects. Even with children who don’t typically mouth objects, I prefer being extra careful with water beads. When Zoey was a toddler, I put this type of sensory bin up out of reach whenever I wasn’t closely supervising Zoey’s work. This can be a simple water table with ice added, too.
Introducing the names of the Antarctic Animals with the 3-Period Lesson
Before I put out the sensory bin, I used the Montessori 3-period lesson to introduce each of the Antarctic animals that are in the Antarctica TOOB (emperor penguin and chick, chinstrap penguin, rockhopper penguin, blue whale, humpback whale, sperm whale, orca, crabeater seal, Antarctic fur seal, and wandering albatross). Zoey was already familiar with many of the animals from our previous work with whales and penguins.
Fun with a Penguin Slide

Having Fun with a Penguin Slide
This is one example of re-creating concepts rather than the exact environment, since there obviously aren’t penguin slides. But, since penguins like to slide into the water, this was a fun addition to our sensory bin.
Feeling an “Iceberg”

Feeling an Antarctic “Iceberg”
Zoey always enjoys feeling the water beads, but this sensory bin has extra sensory appeal with the “icebergs.” Jae from the Pinay Homeschooler had used chunks of ice for an Antarctica sensory bin, which I thought was a great idea. And it really makes the sensory bin a fun activity for winter or summer.
Have you made an Antarctic sensory bin?
If this is your first time visiting Living Montessori Now, welcome! If you haven’t already, please join us on our Living Montessori Now Facebook page where you’ll find a Free Printable of the Day and lots of inspiration and ideas for parenting and teaching! And please follow me on Instagram, Pinterest (lots of Montessori-, holiday-, and theme-related boards), and YouTube. While you’re here, please check out the Living Montessori Now shop.
And don’t forget one of the best ways to follow me by signing up for my weekly newsletter. You’ll receive some awesome freebies in the process!


Leave a Reply